Showing posts with label nuts. Show all posts

Thursday, July 17, 2014

Lemon "Cheesecake" with Berry Topping


I'm actually quite excited with this recipe. I made this for our wedding anniversary back in April (I know! Very late in posting this!) and it was a hit for hubby and myself.

It is only recently that I am onto the band wagon of making raw desserts. It's just to increase my repertoire of creating desserts at home I guess. I love the idea of having a cheesecake without the heavy feeling in my tummy. There is NOTHING wrong with enjoying a cheesecake from time to time of course, but hey, if I could re create something at home that is healthy and nutritious, I'm in.

This require a little planning with the soaking of cashews. It is a very nutrient dense recipe- and very high in calories as well with the amount of cashews in it. Still a treat food for sure.

I am still using my trusty ken wood food processor but lately, been wondering if it is worth investing in a Vitamix or Thermomix? oh first world problems. Nevertheless, I have promise myself that I will not have another appliance unless one breaks down.

As I'm typing this, I just remembered I have a few more slices in the freezer. Oopies! I guess I know what I'm having for dessert tonight.

What do you use? Food processor? Thermomix? Or a high powered blender like Vitamix?

Lemon "Cheesecake" with Berry Topping (12 servings)

Base
150 grams almond meal
100 grams of desiccated coconut
3 medjool dates soaked in water
1 tsp vanilla
pinch salt

"Cheesecake"
500 grams of cashews soaked in water overnight
1 cup of lemon juice
zest of whole lemon
1 tsp vanilla paste
1 tablespoon of honey
1/4 cup of coconut oil melted

Berry topping
1 cup of berries
1/4 cup water
1 tsp honey
1/4 tsp of gelatine powder (mix with 1 tablespoon of water)

Make the base first.
Blitz everything up till it comes together. Press into a 9 inch lined cake tin. Fridge it while you make the "cheesecake".

Blitz all the ingredients together. Make sure it becomes like a smooth paste- not lumpy. Pour into base and freeze for around 30 mins to an hour.

Place berry topping except gelatine into sauce pan. Cook till it becomes soft. Cool and add the gelatine mixture. Pour berry topping onto cheesecake topping and freeze for a further 3-4 hours.

Defrost cake in fridge for 2 hours before serving.
 photo MTWsignature_zpsaefba23f.png

Thursday, July 03, 2014

Raw Almond Chocolate Fudge


There are times where chocolate just hits a good spot. There are some pantry staples that I always stock up. The are almond butter, coconut oil, nuts and definitely chocolate.

An offer came up recently with Mayver's super spread nut butter. It's a mix of peanut, chia and almond. There were going for half price! What a treat. So I grabbed 2 bottles to give treats a go.

Mixing them up with some coconut oil and more nuts plus cacao powder, I placed it in the fridge and tadah, a protein enriched chocolate treat that is refined sugar free and good for us. They are freezer friendly as well which gives it a gorgeous crunch when you are ready to bite into them.

Raw Almond Chocolate Fudge (24 small pieces)
1/4 cup of coconut oil
1/2 cup of nut butter
1/3 cup of cacao powder
1 tsp of vanilla paste
1 tablespoon of honey
1/3 cup of silvered almonds

Beat or mix oil and butter together. Mix through vanilla, honey and cacao powder till smooth. Lastly add nuts. Pour into a lined brownie tray and freeze it for 2 hours. Slice and eat!

 photo MTWsignature_zpsaefba23f.png

Monday, June 02, 2014

Walnut Chocolate Brownies


They say friendships change when you become a parent. For me, its an opportunity to meet more new friends who are parents. Asher have been attending gymbaroo since he was around 8 weeks young. From there, I met a few other mums whom I click with. One of them is also from Singapore and her husband is from Malaysia!

Our sons are only born 2 weeks apart. We started meeting fortnightly for play dates and hosting lunches at respective homes. It's so cute to see the boys watching one another and playing with toys. Of course, they are not at an age where they would play with each other but they appeared to be curious about each other's presence.

I made Elana's Pantry's Walnut Chocolate Brownies for this lovely mother. By the way, she cooks such nourishing lunches for me after knowing how I eat (think pan fried salmon with asparagus with corn, pumpkin soup, and a grilled chicken tenderloin with a side pumpkin and goats cheese salad). That said, she said these brownies were a hit with her family and can't believe it has no gluten and minimal refined sugar in it.


Walnut Chocolate Brownies (I cut it to 24 small bites)
100 grams of dark chocolate chopped roughly (I used lindt)
1/4 cup of coconut flour
2 eggs
pinch of sea salt
1/4 cup of coconut oil
2 tablespoon of honey
1/3 cup of crushed walnuts
handful of chopped dark chocolate

Preheat Oven to 180C. Line a brownie tray with baking paper.
Using a food processor, pulsed dark chocolate. Add in all other dry ingredients first. Pulse till it is well mixed. Then add in all other wet ingredients except the walnuts and handful of dark chocolate.
Pour mixture into pan. Sprinkle crushed walnuts and chocolate over the mixture. Bake for 25-30 minutes.


 photo MTWsignature_zpsaefba23f.png

Monday, March 31, 2014

Pecan Banana Bread


One of my favourite things to do is to bake. I simply love the warm comforting smell and taste coming out of the oven and diffusing to the whole house. There is something about baking that helps me to process the day, and even makes me feel a little better if I'm feeling sad, tired or down.

I wrote about my ambivalence about returning to work or staying at home.  I think at the end of the day, it's about what fits for your family and you. I count my blessings that I have a choice. My mum for instance, did not have a choice and had to return to work when I was 3 months young. Again, I'm one of those blessed kids that was surrounded by many loving family members- including my maternal grandmother whom I'm very very close to.


It's a little strange that I am in this position. I remembered that when I was younger, I thought that I will definitely stay at home. I love my mum and she is a strong independent woman who is a fantastic had working role model. But I also recall times when I wished she is at home. Perhaps that is why, I thought that when I am a mum, that decision will come easily to me.

There is nothing wrong with enjoying paid employment. I work in the area of psychology and am very pleased that I am able to reach out to others. It is what God has directed me to do and I have accepted this gift with both hands. But what happens when God bless you with another gift- a gift of life where you can stay at home and nurture a life at the same time?

I'm a big believer of being attune to your child and respond to his needs. As he grows bigger, I believe I will put him in day care anyway for social interaction with adults and children. Having little immediate family around, I do think it is important to expose him to other activities and children besides the games and classes we attend together. It's finding the balance as we go along I think that could be challenging.

My answer is this- I'm going to pray and wait and see.  If a door opens and it is an opportunity that I know God has directed me to, I will go towards it.  However, if the door closes then, I know where I'm being lead to. I think returning to full time work will not be in the equation.

The hard bit for me, is to stay in the moment. To simply enjoy time with Asher and being a housewife. A role I am so proud to be.

This pecan banana bread is from a recipe that I adapted from a friend. Besides baking being therapeutic, it also makes my hubby happy. I wrote before that he wakes early in the morning to go to work, so that he can be home to be with our son in the evening (and for me to head to the gym). Pecan banana bread is a nutritious quick morning breakfast where he could toast eat and go.


And that makes me happy.

Pecan Banana Bread (12 serves)
4 bananas mashed
1/4 cup nut butter of your choice
2 tablespoons of honey
1/4 cup of coconut flour
1/2 tsp baking powder
1/4 tsp baking soda
1 tsp of vanilla paste
3 eggs
1/4 cup of pecan nuts crushed

handful of crushed pecan nuts

Preheat Oven 180C. Line baking loaf with baking paper.

Whisk honey,  banana, nut butter, vanilla and eggs together. In a separate bowl, place flour, nuts baking powder and soda. Pour wet to dry and fold. Spoon into baking tin. Sprinkle pecan pieces on top. Bake for 35-40 minutes till brown.


 photo MTWsignature_zpsaefba23f.png

Thursday, January 03, 2013

Indian Spiced Nuts


In 2012, I found a new love with munching on nuts. I have always been a fan, but eating clean also means I avoid eating processed snacks. Nuts is such a good source of protein and fat- one that keeps me full and happy.


This post is probably a little late as I made this for some friends and colleagues for Christmas. It turned out to be pretty popular with my FIL and guests at our Christmas party. That's not to say this little snack can't be done through the year too- I think it's pretty handy to have some in the pantry from time to time!


Indian Spiced Nuts
1 cup of cashews
1/4 cup of brazil nuts
1 cup of almonds
1/2 cup of macadamias
1 tablespoon of curry powder
1 tsp of chili powder
1 tsp of turmeric
1 tablespoon of cumin
2 tablespoon of coconut oil
tsp of salt

Pre heat oven to 190C. Toss nuts with all the spices and coconut oil. Toast in oven for 15-20 mins! Cool and eat!


Photobucket

Thursday, April 26, 2012

Chicken Fillet with Almond Sauce


This is one of those handy quick dinner recipes that I love to have in the fridge. Ever since I discover Almond Butter- it's no turning back. I am also a fan of brazil and almond nut butter as well. They taste fantastic on crackers or vegetable stick.

So looking at the container one day, I thought why not make this into a sauce. I know that almonds has lots of fat but from a nutritious point of view, it's good for us and our hearts with the mono saturated fats. Plus it's filling. The key here is portion size of course. The creaminess of the sauce makes it rich hence you don't really need too much of it- maybe 1 or 2 tablespoons will be fine.

It certainly jazz up a salad. I oven baked some chicken fillets rather than pan frying it- one pan on the stove to make the sauce was enough for me. Shove the fillet into the oven, hop into the shower, assemble salad while making sauce. Take chicken out, place on plate, drizzle sauce.. EAT.

There should be more dinners like this every weekday.

Chicken Fillet with Almond Sauce (Serves 4)
6 chicken thigh fillets or 2 chicken breasts slice horizontally
salt/pepper

1/4 cup of almond butter
1/4 cup of water
1 tsp of garlic
1 tablespoon of mirin
few drops of sesame oil

4-5 cup of salad leaves
sliced capsicum
tomatos
lebanese cucumber
1 avocado

Cut fat off chicken thighs. Place on lined oven tray. Pre heat Oven 200C. Season chicken and place in oven for 20 minutes or so.

Heat pan. Saute garlic. Then add almond butter till it becomes soft and nearly runny. Add water and whisk together. Season with mirin and sesame oil. Drizzle on chicken and salad.


Photobucket

Thursday, September 01, 2011

Three Nut Birthday Cake


 What did I do when I completed my 30 day no sugar and sauces challenge? I baked!


It was a friend's birthday and I had the luxury of baking him and a few friends his birthday cake this year. I kept it really simple though and chose a recipe from Belinda Jeffery's Mix and Bake Book. I thought it was interesting as the cake featured a crust and then the filling itself. Upon looking at the ingredients and method of baking, I imagined the cake to have a macaroon like texture which was what it exactly turned out to be.

I drizzled some melted dark lindt chocolate in a zig zag motion (as recommended by Belinda Jefferys), and I have to say it turned out looking terrific!

Three Nut Birthday Cake

Crust
120 grams almond meal
2 1/2 tablespoon of castor sugar
3 1/2 tablespoon of plain flour
75grm cold unsalted butter cut into small chunks

Filling
125g hazelnuts
100 grams pecans
1/2 cup plain flour
1/2 tsp baking powder
1 cup of shredded coconut
2 eggs
1 egg yolk
1 cup of brown sugar
1 tsp vanilla extract
icing sugar for dusting
200 grams of melted lindt chocolate for decoration.

Pre heat oven to 180C. Line and oil a 20 cm springform cake tin.

Make the crust first- blitz almond meal, sugar, flour into food processor till combined. Add butter and whiz it till it resembles coarse breadcrumbs. Press it evently in the cake tin. Fridge it to chill.

Filling- grind hazelnuts, then the pecans in the food processor. Set aside. Place flour and baking powder in medium size bowl. Whisk them together. The add the grounded nuts and coconut. Whisk to combine.

Using an electric beater, mix all the eggs and sugar till fluffy. Pour this mixture to the flour/nut mixture. Fold and combine well. Pour mixture into chilled crust. Shake to even out.

Bake for 40 minutes or so till it is set but soft in the middle. Cool the cake. Loosen it with a butter knife if needed. When ready to serve, dust the top with icing sugar and using melted dark chocolate, drizzle it in a zig zag motion to form the pattern.

Photobucket

Friday, July 15, 2011

Chicken and Pistachio Korma


At the beginning of the year, I said that one of my goals would be to make curry from scratch. I spotted this recipe from Poh's Kitchen and thought it looks really interesting. Korma is an Indian style curry- often served thick like stew.

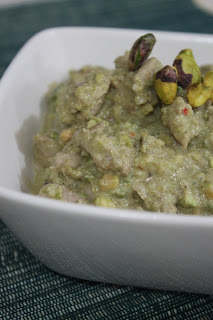
I love the use of pistachios in this. The nutty flavour of this is a sure winner. I didn't add cream but pour in some coconut cream instead which added another layer of creaminess to it. The other thing I did was to use a mixture of green and red chilis in this. No other reason but to fulfill my cravings for hot and spicy curry on a cold night.

Surprisingly, the curry paste was soo easy to do. Did I mention my food processor? A few blitz and the sauce was done!

Chicken and Pistachio Korma (serves 4) 
2 onions sliced
1/2 cup pistachio kernels
4 green chillies
2 red chili padi 
1-2 tablespoons of ginger minced + garlic mince
1 tablespoon of coriander powder
dash of white pepper
500 grams of chicken thigh chopped
100 grams of coconut cream
1 cup of water
1 tsp of garam masala powder

Boil onions in one cup of water, drain, cool and puree. Puree pistachios and green chilli, keeping a few nuts aside for garnish.

Heat the oil and add the onions and sauté for four minutes, do not brown. Add ginger and garlic paste. Fry for one minute and stir in coriander and pepper powders. Add pistachio and green chilli paste and cook for about a minute.
Put in the chicken with the salt and mix well. Add a little water (quarter of a cup) and cook gently until done. Add coconut and garam masala. Garnish with pistachio nuts and serve hot.


Photobucket

Friday, March 11, 2011

Almond Cookies 3


You know my love for almond cookies! I have made these and these previously.It's a cookie that I have given many titles, including "Chinese New Year Cookies", "Office treats', "the Easy Cookie", "To impress uni mates", "my hubby needs cookies", ...etc


I even managed to convert a friend who does not cook or bake to make some of these.

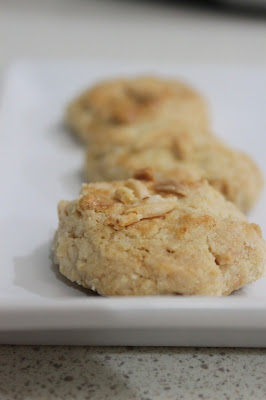
This version is more crisp. I added in almond meal instead of using flour only. Hubby said these were addictive and is his afternoon treat at work. I'm happy that it turned out better than expected.


Almond Cookies 2
250grams of silvered almonds
250 grams of plain flour
200 grams of almond meal
225 grams of icing sugar
260 grams of  oil
1/2 tsp baking powder
1/2 tsp baking soda
1/2 tsp salt

Egg wash- 1 egg yolk.

Preheat oven to 150C. Toast almonds. Reserve 50grams for garnishing.

In a mixing bowl, mix plain flour, almond meal, icing sugar, baking powder, soda and salt together. Add in  oil and almonds. Knead to make dough.

Shape dough and brush with egg wash. Press some reserved almonds on it. Bake for 20-25 minutes till brown.


Photobucket

Sunday, February 27, 2011

Cashew Nut Cookies 1

A few years ago, just before hubby and I got married, we made our annual trip back to his hometown in Malaysia. There, my mother-in-law would often have a shoebox filled with newspaper cuttings reserved for us. Occasionally, she will call me down to her kitchen and show me more newspaper clippings, usually recipes that she wanted to try but does not have the time or opportunity and would then stuff the clippings in one of her drawers.

I recall that she showed me a recipe for Hup Tow Sou before or a type of melt in your mouth cashew nut cookies. She reminded me that hubby's favourite cookie is that, and she has reserved the recipe in the event that one day she would be able to make it for him. She handed the recipe to me and asked me to give it a go, given that it is not often he comes home.

Now, I did try that recipe, twice in fact and I failed sooo miserably with it. I don't even recall taking any photos or documenting it-probably due to it being such a failure (and u guys know I am not shy with documenting my challenges in baking) that it was too traumatic for me to remember it. Or perhaps, not wanting my mother in law to know that I didn't succeed! Not that she would mind I am sure, but the self talk of being a new wife, and the bruised ego of not being even able to make my hubby's favourite childhood cookie clouded over me for a while.

Exaggeration aside, I never did try attempting any other form of cashew nut cookies since then. Silly me really, because my mouth waters when Little Corner's and Lily's new year goodies posts came to mind. This time, I decided to go with a recipe from a book that I have other success from. It wasn't the traditional Hup Tow Sou but it has a lovely crisp cashew nut flavour, with a melt in your mouth texture. I would say this has a more crisp texture as well.

You can imagine the relief that wash over me when the batch of cookies came out looking normal. ;P

Cashew Nut Cookies (makes around 50) 
250 grams butter
180 grams icing sugar
400 grams plain flour
1 tsp baking powder 
180 grams of ground cashew nuts (using nuts that were roasted)
1 egg yolk
1 tsp vanilla essence
100 grams of whole cashew nuts for garnishing

Egg wash- 1 egg yolk ( I used the whole egg)

Preheat oven to 160C. Line 2 or 3 baking trays with baking paper.

Sift plain flour and baking powder. In another bowl, cream butter and icing sugar together. Add in the egg yolk and vanilla essence. Flour flour and ground cashew nuts to batter. Mix well til it forms a dough. Shape dough in little balls using a tsp. Alternatively, you can roll it out and use a cookie cutter. Brush dough with egg wash and press a cashew nut on top. Bake for 20-25 mins.


Photobucket

Wednesday, December 01, 2010

Peanut Chunky Noodles

About a year ago, I wrote about my love for peanut butter and how I used it in my stir fry and noodles. My reasoning is that a tablespoon of peanut butter spread over a few meals isn't that bad for you.. I even resisted licking the spoon!

That aside, I tried these noodles out again. This time, with alot less chicken and more veges and tossed in even some peanuts itself (hence less of the peanut butter). The result still has that creamy taste but with added crunch from fresh nuts. Instead of soft noodles, I used the "maggie mee" or instant noodles that have been air dried. I love the texture of those noodles!

Peanut Chunky Noodles (Serves 6- good for freezing)
5 noodle cakes cooked and drained.
2 chicken breast diced
1/4 cup of peanut butter
3 tablespoon of oyster sauce
3 tsp of fish sauce
dash sesame oil
2 eggs

garlic
1 red onion sliced
mixed veges I used 1 green capsicum, 1 red chilli sliced, 2 carrots sliced, 1 cup of mushrooms and baby corn.
1 cup of peanuts roasted

Saute garlic and onion. add chicken and cook till nearly done. Toss veges through it and all the sauces and peanut butter till it becomes creamy. Add 1/2 cup of water if needed. Toss through veges. Taste and season. Serve with some peanuts on it.


Sharing my dish with presto pasta love! This week Ruth from Once Upon a Feast is hosting again.


ps- 24 more days to CHRISTMAS!

Monday, May 17, 2010

Chili Garlic Squid Fettuccine with Pinenuts

So we have been in a seafood mood lately. One has to venture away from mince sometimes! I remembered learning how to score squid when I was about 17 years old. An aunt of a housemate invited us over for dinner (She is such a brilliant cook!). As you do, I offered to help and standing in the kitchen, she gave me tips on choosing calamari, cleaning them and of course cutting them into good sized pieces.

I love seeing squid sizzle and curl into a nice shape. I kept this really simple. Marinating the squid with some lemon juice, salt and pepper.I grilled it quickly and then toss the the squid + veges with pasta. Dash of olive oil and sprinkle of pine nuts, dinner was served.


Chili Garlic Squid Fettuccine with Pinenuts 
250 grams of fresh fettuccine (Cooked to packet directions, keep warm in a bowl)

4 squid tubes cleaned and score diamond crosses
1 tsp of chopped garlic
tsp of chopped chili 
1/2 lemon juice
pepper and salt

1 bowl of chopped mushroms
1 zucchini grated/shredded and water squeezed out from it.

1/4 cup of pine nuts toasted
Parmesan cheese to serve if you like it

Heat grill pan to very hot. Quickly toss squid through till cooked. In the same pan, add the veges for 30 seconds. Pour veges and squid into bowl of noodles. Tossing it through with some extra virgin olive oil. Sprinkle pinenuts and cheese to serve.

Dishing pasta love to friends at Presto Pasta founded by Ruth. This week, it is hosted by Susan from the Well Seasoned Cook! I am so getting into the stringly ball game!

Monday, April 26, 2010

Almond Crusted Fish Wrap

I love public holidays! ahh.. Yesterday was Anzac Day and therefore, it is a public holiday today. Somehow, hubby and I are appreciating free days like this even more recently. More time to rest, do housework, go for walks/jogs and plan our future. In fact, we had 1 hr of running and walking (I ran, he walked!) before breakfast. Surely this is the dream we have to spend quality and restful time together.


I made this dish a few weeks ago when fish was on sale. It was shark-which was probably the worse decision I made that day. The fillet,although fresh was tougher and thicker. Later, I made breaded fish using dory and it was sooo good. Nevertheless, I thought of using almond meal as the crust as I had some in a bag that I wanted to finish using. Love the crust for sure but will add more seasoning. I served it in a tortilla and salad leaves.


Almond Crusted Fish Wrap (Serves 4) 
4-6 small to medium size fish fillets.
around 1 cup of almond meal seasoned with pepper, salt and some paprika.  
2 eggs lightly beaten
spray oil

Salad leaves, avocado, cucumber and chopped tomato mixed with some lemon juice.

Dip each fish fillet into the egg mixture then coat it in the almond mixture. Heat fry pan till hot and spray with the spray oil. Pan fry fish on each side for around 4 minutes till cooked. Serve wrapped in a tortilla with the veges and some chili or tomato sauce.

Tuesday, December 01, 2009

Baklava Fingers

The first time I ate a Baklava, my response was "so sweeetttt". The nutty taste plus crisp filo pastry kept me hooked. I wasn't able to take more than 1/4 of a slice of baklava at one sitting but it was special.


To recreate it at home just seems an impossible feat. Layers of filo pastry + cups of chopped up nuts doesn't seem to appeal to me. It screams "too much work" Until I discover Karen Martini's Baklava fingers recipes. I love the way we can layer the pastry and roll it up like a spring roll-it create the layers without too much work. Everyone knows filo pastry needs tender loving care and mine just seem to tear easily-hence the less I get to handle it, the better. Furthermore, the rolling bit means it is more forgiving.

What I did differently for this recipe however is to reduce the amount of syrup used to soak the baklava so that it is slightly less sweet. As a result, the baklava can be kept for a day or two longer.  And of course, my lovely food processor came in really handy when making the nuts mixture.

I grab this recipe off Better Homes and Gardens Magazine. Quick search on the Internet revealed Karen's video on how she made it. So it's bonus- you can watch it and follow it step by step too.

The hubby said next time, I have to scan ALL my recipes and save it in the computer with backups- just in case I lose this one. You can tell that he like this heaps!

Baklava Fingers

1 1/2 cup of walnuts toasted
1 cup of almonds toasted
50 grams brown sugar
50 grams caster sugar
2-4 tsp of ground cinnamon
2-3 tsp of all spice
150 grams dried figs chopped
375 packet of filo pastry
200 grams of melted butter (but I used around 50grams if not less)
1 egg lightly beaten

Syrup
200 ml water
300 grams caster sugar
3 tbsp honey
3 cinnamon sticks
1 lemon grated zest and juice

Line an oven tray with baking paper. Preheat Oven 180C.  Put sugars, cinnamon and all spice in food processor and process till nuts are coarsely chopped. Transfer into bowl and toss figs through.

Put 1 sheet filo on a clear bench, brush with melted butter, repeat with 3 more sheets. Cut pastry sheets in half vertically the brush edges with butter and egg. Sprinkle around 3 tablespoon or a handful of nuts around each segment, leaving a border around the edges.

Roll segments up like a spring roll. Put logs on trays and brush it with some butter.

Put trays in oven and bake for 20 mins. Cut logs into 4 equal pieces and put on a platter. Drench with syrup. Let it rest for around 2 hours before serving.

To make syrup- put all ingredients in small pan over medium heat. Stiry for 10 minutes or until it is dissolved. Remove and cool.

Tuesday, October 13, 2009

Dark Chocolate and Almond Torte


When it comes to making cakes, I have to say that it is only recently that I got more into it. Somehow, many of my cakes come out looking more warped with cracked tops... oh, and I am not very patient in decorating cakes either!


A series of birthdays allowed me to get back into the kitchen and start the practice. A flourless cake with simple vienna almonds as decorations seem to be the way to start!The result was a rich and dense cake. That certainly hit the chocolate lover in me.

Dark Chocolate and Almond Torte (from Womens' Weekly)
160 grams of dark choc bits
160grams butter
5 eggs seperated
3/4 cup of caster sugar
1 cup of almond meal
2/3 cup of tasted flaked almonds
1/3 cup of dark chocolate bits (extra)
1 cup of vienna almonds (or more!)

Dark Chocolate Ganache
125 grams dark eating chocolate chopped coaresly
1/3 cup of thickened cream.

Preheat Oven to 180C. Grease 9inch cake pan. Line it.
Melt chocolate and butter till it become smooth. Cool
Beat egg yolks and sugar till it becomes thick and creamy (electric mixer). Fold in chocolate mixture, almond meal, flaked almonds and rest of the chocolate bits.
In another clean dry bow, whisk egg white till soft peaks form. Fold into chocolate mixture in two batches. Pour mixture in pan and bake for around 45 minutes. Cool in pan. Turn cake, top side up onto wire rack to cool.

Meanwhile melt chocolate and cream. Cool. Spread ganache onto cool cake. Decorate cake with vienna almonds.
ps-vienna almonds are caramal coated almonds.
Related Posts Plugin for WordPress, Blogger...